其實 UITableViewController 的用法不複雜,我發覺網上很多例子也會配合 Interface Builder,對初學者來說 Interface Builder 有點複雜,一時之間根本搞不清 XIB 和 Class 的關係,所以我以下的例子不會用 Interface Builder去製作表格應用程式。
那麼現在先新增一個 Window-based Application,並命名為 Table。
完成後新增一個 UIViewController subclass,並選取 UITableViewController subclass,不用選取 With XIB for user interface,因為不會用到 Interface Builder,命名這個 Class 的名稱為 MyTable。
新增完成後暫時不用理它,我們去打開 TableAppDelegate.h,加入一個 UINavigationController 去控制 UIViewController 之間的轉換,將原本的內容換成以下內容:
#import <UIKit/UIKit.h>
#import "MyTableController.h"

@interface TableAppDelegate : NSObject <uiapplicationdelegate> {
    UIWindow *window;
    UINavigationController *navigationController;
}

@property (nonatomic, retain) IBOutlet UIWindow *window;

@end
儲存並關閉 TableAppDelegate.h,然後打開 TableAppDelegate.m 並修改一下 - (BOOL)application:(UIApplication *)application didFinishLaunchingWithOptions:(NSDictionary *)launchOptions 這個 Method:
- (BOOL)application:(UIApplication *)application didFinishLaunchingWithOptions:(NSDictionary *)launchOptions {

    // Override point for customization after application launch.
    UITableViewController *tableViewController = [[MyTableController alloc] initWithStyle:UITableViewCellStyleDefault];

    navigationController = [[UINavigationController alloc] initWithRootViewController:tableViewController];

    [navigationController.navigationBar setBarStyle:UIBarStyleBlack];

    [window addSubview:navigationController.view];

    [window makeKeyAndVisible];

    return YES;
}
程式碼第 4 行是創造出剛才新增的 MyTableController 的實例。而表格風格有以下這些:
- UITableViewCellStyleDefault
- UITableViewCellStyleValue1
- UITableViewCellStyleValue2
- UITableViewCellStyleSubtitle
聯絡人應用程式是 UITableViewCellStyleDefault 風格,而 iPhone 設定 是使用 UITableViewCellStyleValue1 的風格,另外 2 款沒見過有應用程式使用。
程式碼第 6 行是創做 UINavigationController 的實例並將 MyTableController 設為頂端的 ViewController。
程式碼第 8 行是將頂上的導覽列轉為黑色,只是我覺得比較好看,不轉也沒問題。
程式碼第 10 行是將 navigationController 的頂端的 UIViewController 顯示出來。
現在完成了基本顯示,但還未可以運行,因為 MyTableController 內的程式碼有錯誤。
現在打開 MyTableController.h,新禎一個陣列去儲存資料,將以下程式碼複製並取化現有內容:
#import <UIKit/UIKit.h>

@interface MyTableController : UITableViewController {
    NSMutableArray *data;
}

@end
儲存並關閉 MyTableController.h,然後打開 MyTableController.m 並修改 - (void)viewDidLoad 這個 Method:
- (void)viewDidLoad {
    [super viewDidLoad];

    self.title = @"Table";

    //Create a data source
    data = [[NSMutableArray alloc] init];

    for (int i = 65; i <= 90; i++){

        //Create a section
        NSMutableArray *section = [[NSMutableArray alloc] init];

        //Section Header
        NSString *sectionName = [NSString stringWithFormat:@"%c", i];
        [section addObject:sectionName];

        for (int j = 1; j <= (rand() % 10) + 1; j++){

            //Row Content
            NSString *row = [NSString stringWithFormat:@"I am %c - %i", i, j];
            [section addObject:row];

        }

        [data addObject:section];
        [section release];

    }
}
因為我沒有大量資料,所以自己動手去制作一堆資料並在表格載入時自動去創造資料。
我使用了 2D 陣列的原因是表格可以將資料分類,例如: A 字開頭的一類,B 字開頭的又另一類,這樣可以令使用者更容易找到他們想要的資料,下面會提到分類還有一個好處。
以上程式碼創造的資料會分類為 A - Z,每一個類別也會隨機創造出 1 到 10 個資料 (0 號索引是放類別名稱),現在有了資料便可以去修改一下錯誤的程式碼,將 - (NSInteger)numberOfSectionsInTableView:(UITableView *)tableView 修改為以下內容:
- (NSInteger)numberOfSectionsInTableView:(UITableView *)tableView {
    // Return the number of sections.
    return [data count];
}
以上的內容是返回一個資料的類別數目給 UITableViewController 使用。返回的數值一定要大於 0。
- (NSInteger)tableView:(UITableView *)tableView numberOfRowsInSection:(NSInteger)section 亦要修改一下:
- (NSInteger)tableView:(UITableView *)tableView numberOfRowsInSection:(NSInteger)section {
    // Return the number of rows in the section.
    return [[data objectAtIndex:section] count] - 1;
}
以上的程式碼會返回特定類別內的資料數目給 UITableViewController 使用。因為 0 號索引是放類別名稱,而索引不包進資料數量內,所以總資料數量減去 1 。返回的數值也一定要大於 0。
以下的 Method 是 XCode 沒有預先做好的,需要自己加上:
- (NSString *)tableView:(UITableView *)tableView titleForHeaderInSection:(NSInteger)section {
    return [[data objectAtIndex:section] objectAtIndex:0];
}
以上的程式碼會返回特定類別內容給 UITableViewController 顯示出來。
那資料怎麼顯示出來? 表格是由很多 UITableViewCell 所組成,而資料將會放到到 UITableViewCell 內顯示出來,UITableViewCell 的樣子可以自己定的,因為這篇是簡單使用方法,或者遲一點寫一篇如何改變 UITableViewCell 的樣子。現在你可以籍由以下的 Method 去將資料夜到 UITableViewCell 內。
- (UITableViewCell *)tableView:(UITableView *)tableView cellForRowAtIndexPath:(NSIndexPath *)indexPath {

    static NSString *CellIdentifier = @"Cell";

    UITableViewCell *cell = [tableView dequeueReusableCellWithIdentifier:CellIdentifier];
    if (cell == nil) {
        cell = [[[UITableViewCell alloc] initWithStyle:UITableViewCellStyleDefault reuseIdentifier:CellIdentifier] autorelease];
    }

    // Configure the cell...
    NSInteger section = [indexPath section];
    NSInteger row = [indexPath row];
    [cell.textLabel setText:[[data objectAtIndex:section] objectAtIndex:row + 1]];
    return cell;
}
第 11 行開始的才是的加入的程式碼,首先由 indexPath 抽取出 section 和 row,section 是一個數字,目的是令程式知道現在是第幾個類別,好讓我們令夠正確取得資料,而 row 則是第幾行的資料,請緊記這不是 A - Z 的資料的第幾行,面是現在的類別中的第幾行資料。正確拿到資料後便可以幾資料放到 UITableViewCell 內的 textLabel。最後返回 UITableViewCell 給 UITableViewController 顯示出來。
現在可以運行程式,應該會像以下的樣子:
但內置的聯絡人應用程式旁邊有一個類別的列表,那又是怎麼做的? 其實很簡單,只需將所有類別放在一個陣列內並返回給 UITableViewController 使用就可以,你需要手動新增以下 Method:
- (NSArray *)sectionIndexTitlesForTableView:(UITableView *)tableView{
    NSMutableArray *index = [[NSMutableArray alloc] init];
    for (int i = 0; i < [data count]; i++){
        [index addObject:[[data objectAtIndex:i] objectAtIndex:0]];
    }
    return index;
}
會變成以下樣子:
現在顯示資料沒有問題了,但想按下那筆資料便可以看詳細內容。首先新增一個 UIViewController subclass 命名為 DetailViewController。
打開 DetailViewController.h 加入以下內容:
#import <UIKit/UIKit.h>

@interface DetailViewController : UIViewController {
    NSString *data;
}

@property (retain, nonatomic) NSString *data;

@end
現在打開 DetailViewController.m,請將以下內容加到 @implementation DetailViewController 下一行:
@implementation DetailViewController

@synthesize data;

//.....source code
將 - (void)viewDidLoad Method 改成以下這樣來顯示資料:
- (void)viewDidLoad {
    [super viewDidLoad];

    self.title = data;

    UIView *rootView = [[UIView alloc] init];
    self.view = rootView;

    UILabel *label = [[UILabel alloc] initWithFrame:CGRectMake(0, 0, 320, 50)];
    label.text = data;

    [self.view addSubview:label];
    [label release];
}
現在回到 MyTableController.h 去 import DetailViewController.h 令到 MyTableController 可以使用到 DetailViewController:
#import <UIKit/UIKit.h>
#import "DetailViewController.h"

@interface MyTableController : UITableViewController {
    NSMutableArray *data;
}

@end
儲存後打開 MyTableController.m 作出少量修改,將 - (void)tableView:(UITableView *)tableView didSelectRowAtIndexPath:(NSIndexPath *)indexPath 加入以下程式碼:
- (void)tableView:(UITableView *)tableView didSelectRowAtIndexPath:(NSIndexPath *)indexPath {
    // Navigation logic may go here. Create and push another view controller.

    NSInteger section = [indexPath section];
    NSInteger row = [indexPath row];

    DetailViewController *detailViewController = [[DetailViewController alloc] init];

    detailViewController.data = [[data objectAtIndex:section] objectAtIndex:row + 1];
    [self.navigationController pushViewController:detailViewController animated:YES];
    [detailViewController release];

}
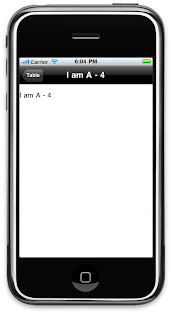
以上的 Method 目的是要知道使用者現在選取了那一項資料,再將資料放到 DetailViewController 內顯示出來。
- (UITableViewCell *)tableView:(UITableView *)tableView cellForRowAtIndexPath:(NSIndexPath *)indexPath 也要作出修改,令 UITableViewCell 顯示一個箭頭,提示用戶按下資料看詳細內容 (雖然我沒有加入真的詳細內容)。
- (UITableViewCell *)tableView:(UITableView *)tableView cellForRowAtIndexPath:(NSIndexPath *)indexPath {

    static NSString *CellIdentifier = @"Cell";

    UITableViewCell *cell = [tableView dequeueReusableCellWithIdentifier:CellIdentifier];
    if (cell == nil) {
        cell = [[[UITableViewCell alloc] initWithStyle:UITableViewCellStyleDefault reuseIdentifier:CellIdentifier] autorelease];
    }

    // Configure the cell...
    NSInteger section = [indexPath section];
    NSInteger row = [indexPath row];
    [cell.textLabel setText:[[data objectAtIndex:section] objectAtIndex:row + 1]];
    [cell setAccessoryType:UITableViewCellAccessoryDetailDisclosureButton];
    return cell;
}
運行應用程式會像以下的樣子:
上面設定的 Accessory 一共有 4 種:
- UITableViewCellAccessoryCheckmark
- UITableViewCellAccessoryDetailDisclosureButton
- UITableViewCellAccessoryDisclosureIndicator
- UITableViewCellAccessoryNone
以下的是 UITableViewCellAccessoryCheckmark 樣式:
以下的是 UITableViewCellAccessoryDisclosureIndicator 樣式:

而 UITableViewCellAccessoryNone 即是不顯示任何 Accessory。
今篇就說到這裡完結,要是有什麼問題可以留言給我。
範例下載: Table.zip
相關書籍:


